Compression Test 2011 Harley Dyna
- Compression test information herein specifically applies to 2011 Harley-Davidson Dyna FXDC Dyna Super Glide Custom, FXDB Street Bob, FXDF Fat Bob and FXDWG Dyna Wide Glide.
Compression in an internal combustion engine is the reduction in volume of the fuel mixture before ignition. Once the intake valves close, the piston rises up to press or squeeze the fuel and air mixture together under high pressure. Engine compression loss is a leak in one or more cylinders. Compression loss could be a sign piston rings need replacement or improperly seated valves. A compression test can determine the source of cylinder compression leakage. A cylinder compression gauge with a screw-in type adapter is required to check compression pressure. The compression gauge part number is HD-33223-1. For reference, all twin cam motors require a 12 mm adapter with the compression gauge. Use the step-by-step compression test procedures to establish compression readings. Then use the diagnoses chart to interpret compression test results.
Compression Test Procedures
- Start the motor and allow it to reach normal operating temperature.
- Turn off engine
- Disconnect spark plug wires. Clean away any debris around the base of the spark plugs before removing them so as to prevent pieces of waste to enter the cylinder.
- Remove spark plugs.
- Remove air cleaner. Refer to air cleaner assembly diagram for help.
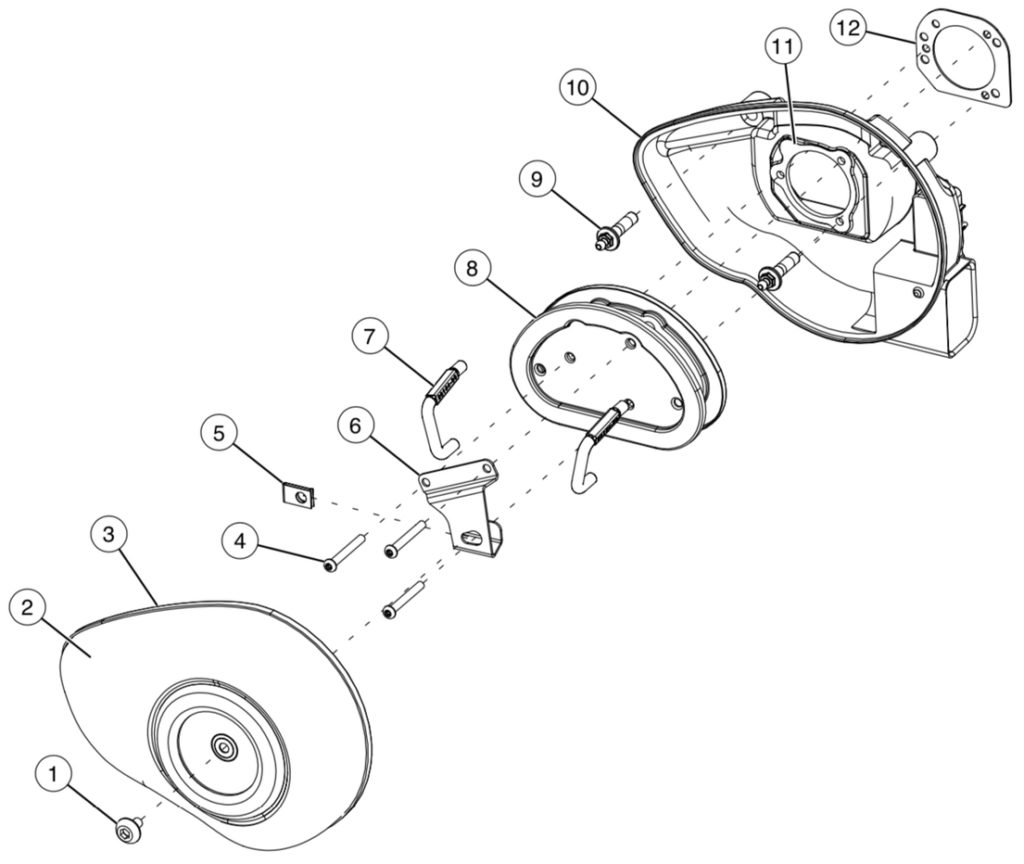
Air Cleaner Assembly Components. (1) Cover screw. (2) Air cleaner cover. (3) Seal ring. (4) Three screws. (5) Clip nut. (6) Bracket. (7) Two breather tubes. (8) Filter element. (9) Two breather bolts. (10) Backplate. (11) Gasket. (12) Gasket. - Attache the compression tester to the engine’s front cylinder using the instructions outlined by testing gauge manufacturer.
- Place the transmission in neutral.
- Hold throttle at wide open position and attempt to crank the engine continuously until it achieves 5 to 7 compression strokes. Make sure to keep note of the gauge’s readings at the end of the first and last cylinder compression strokes. Write down test results.
- Repeat cylinder compression test procedures on rear cylinder.
- Make sure the throttle is closed.
- Reassemble the air cleaner. Refer to air cleaner assembly illustration for help.
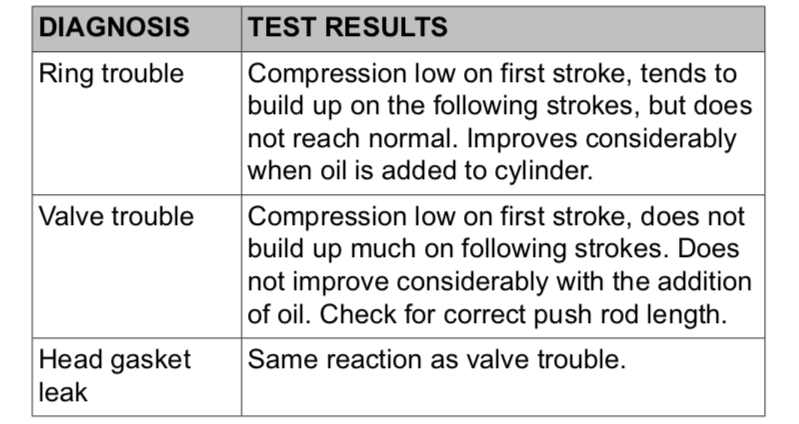
- If the final compression reading are a minimum of 125 psi (862 kPa), and there is not more than a 10 percent variance between cylinders, compression is said to be normal. If compression does not meet factory specifications, refer to the compression test results diagnosis chart.
- If compression readings do not meet minimum specifications, use a tube to introduce 15 ml (1/2 oz.) of engine oil into each cylinder and perform the compression test on both cylinders again. If the compression test readings are considerably higher the second time around, piston rings are probably worn.
Compression Test Results